
Installation and setup
Install AllCoach on your WordPress site, set your currency, and connect Google Meet in a few steps.
Last updated on May 19, 2026
Installation and setup
Start writing your documentation here...
This guide walks you through installing AllCoach and completing the initial setup so you are ready to create your first program.
Step 1: Install the Plugin
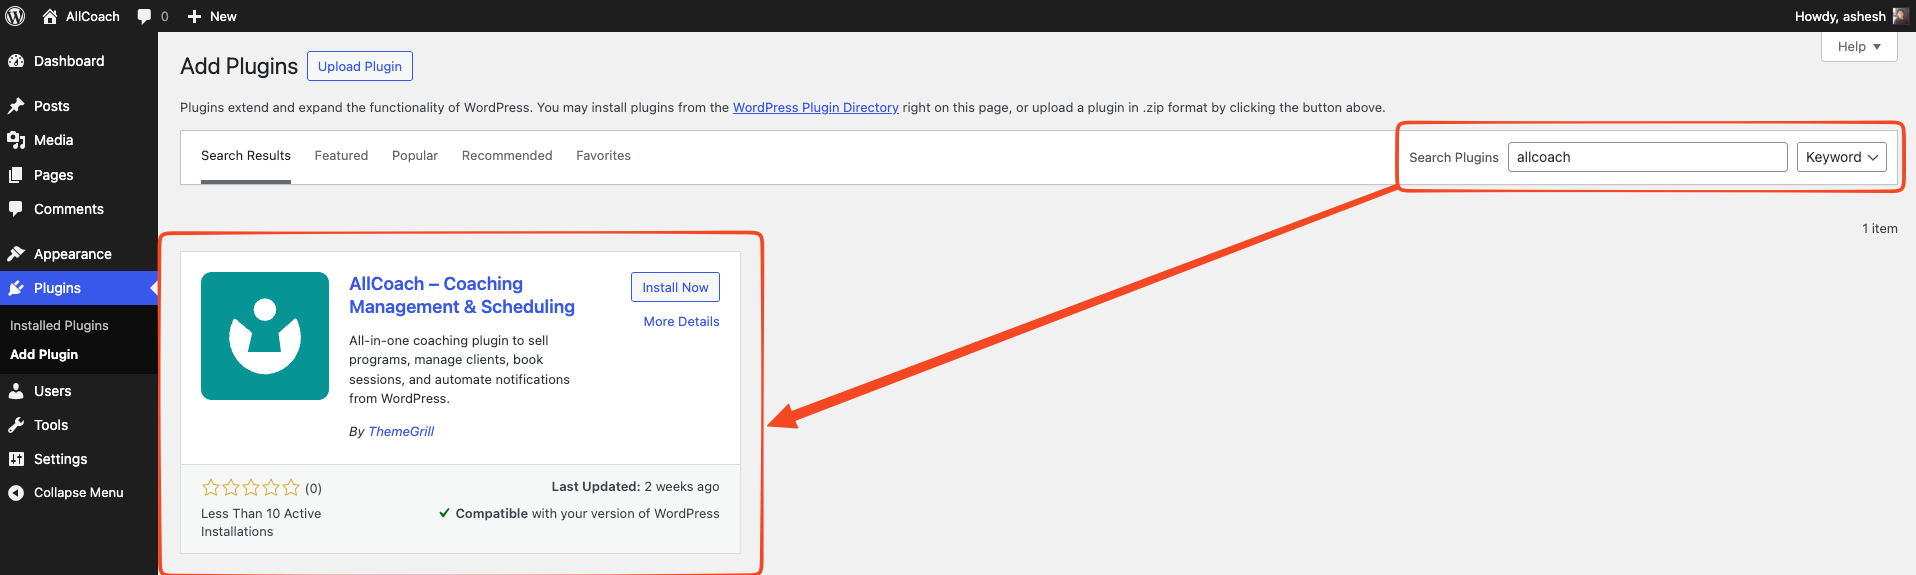
Log in to your WordPress admin dashboard
Go to Plugins → Add New Plugin
Search for AllCoach
Click Install Now, then Activate
Step 2: Complete Initial Setup
After activation, AllCoach adds a new AllCoach menu item in your WordPress admin sidebar.
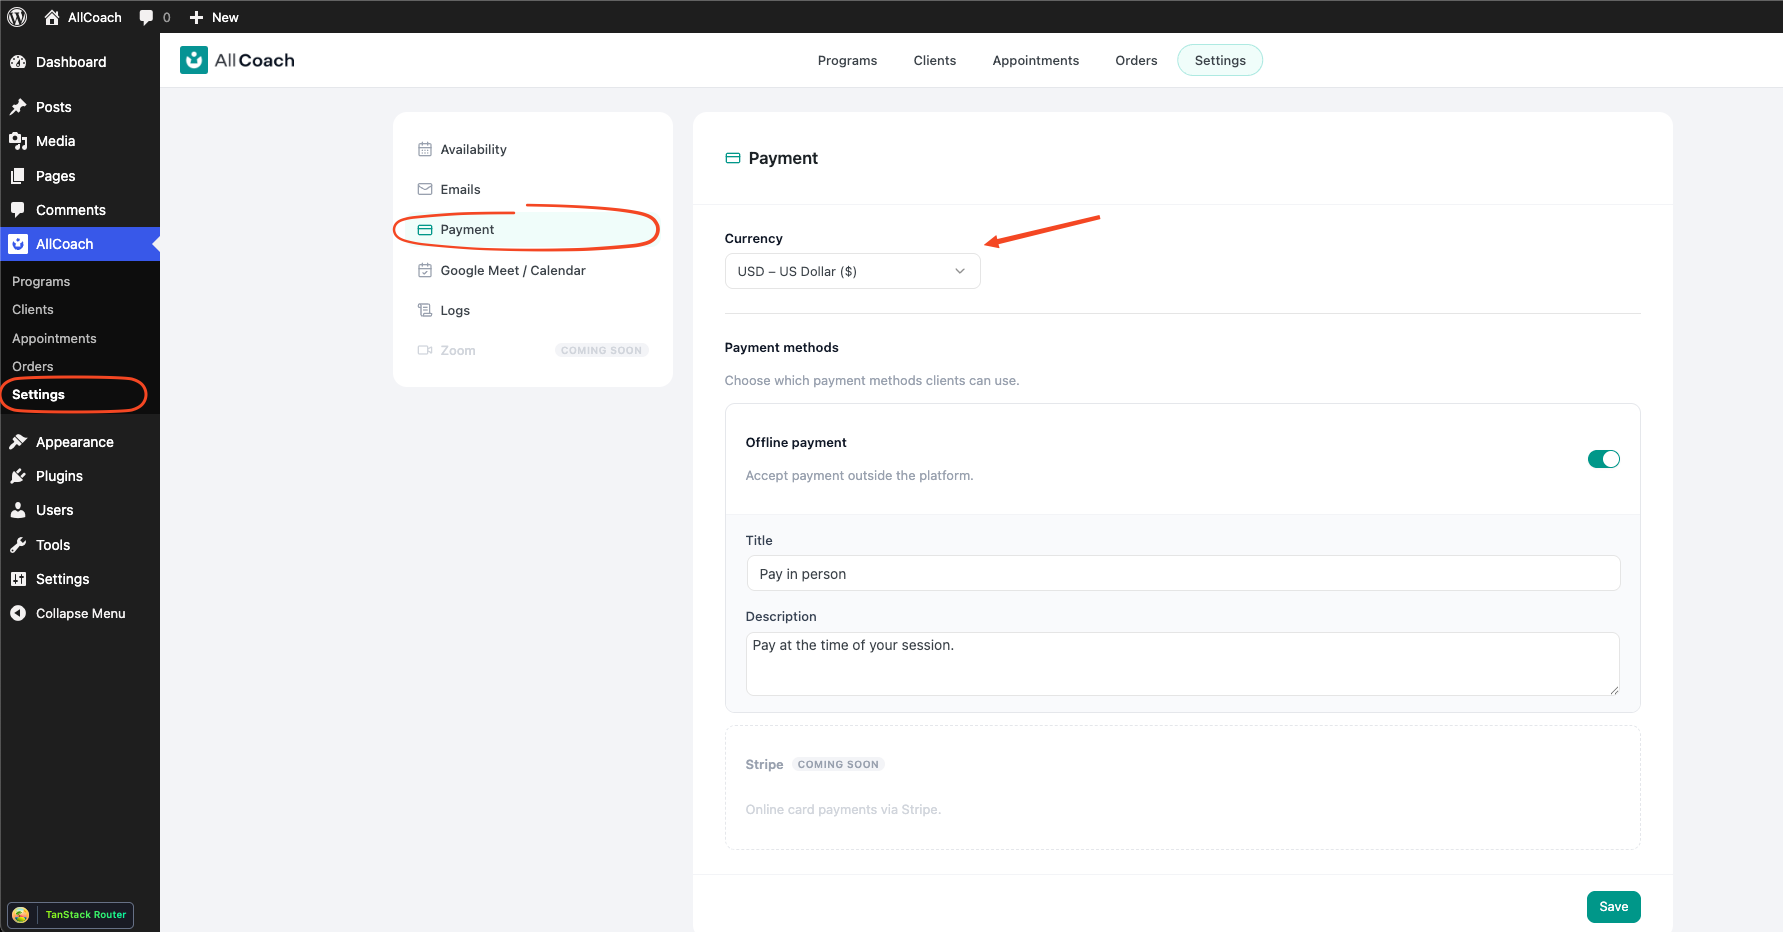
Go to AllCoach → Settings → General
Set your preferred currency (used for all program prices)
Click Save
Connect Google Meet
AllCoach requires a Google account to generate video call links for sessions. You must complete this step before clients can book sessions.
Step 3: Pages Are Ready Automatically
When AllCoach activates, it automatically creates two pages on your site:
My Account - the client portal where clients log in, complete activities, and book sessions
Checkout - the purchase page clients land on when they visit a program checkout link
No manual setup is needed. Both pages are published and configured automatically.
You're Ready
Once currency is set and Google Meet is connected, you can: